Demonstratives: Construction Animations
Guide to Developing Construction Animations
3D animations are among the strongest pieces of evidence available to litigators today. With the power to make complex ideas simple—graphical animations can leave jurors, judges and mediators (all of whom consume visual content daily) with a lasting memory of key arguments and evidence.
When it comes to presenting the intricate concepts in a construction case, making sure you move from true images or video of the subject (building, bridge, etc.) to the model, animation or image is key. Any inconsistency will likely be attacked by opposing counsel. Here are some considerations for making the best use of animations in your case:


How can I show what has happened over time based on a forensic engineering investigation?
Illustrate and label the materials used, which can be accomplished via time-lapse showing precisely how a building (or portion of a building) was originally constructed. Utilize graphics to depict failure in the construction of the building or within its structural components. Show a time-lapse of the distinct steps of a repair – through materials and application – all labeled for clarity. From materials, to measurements, and layout, show how a structure performs – through usage, in the elements, over time.


How do I show what is happening inside a wall cavity or other enclosed space?
One of the best ways to illustrate a blueprint is to make it 3D. Creating a 3D model of a building allows the viewer to go inside a structure/building—so judge and jury are able to visualize the occurrence/matter in question precisely, even from multiple angles. You can also utilize video to show complex depictions of events or structures, seamlessly. Graphics can show what literally would otherwise be impossible to view. Use them to illustrate moving inside a building or structure, through walls, and into substructures and other internal features (such as pipes, walls, or brick).


How do I isolate and view individual building components?
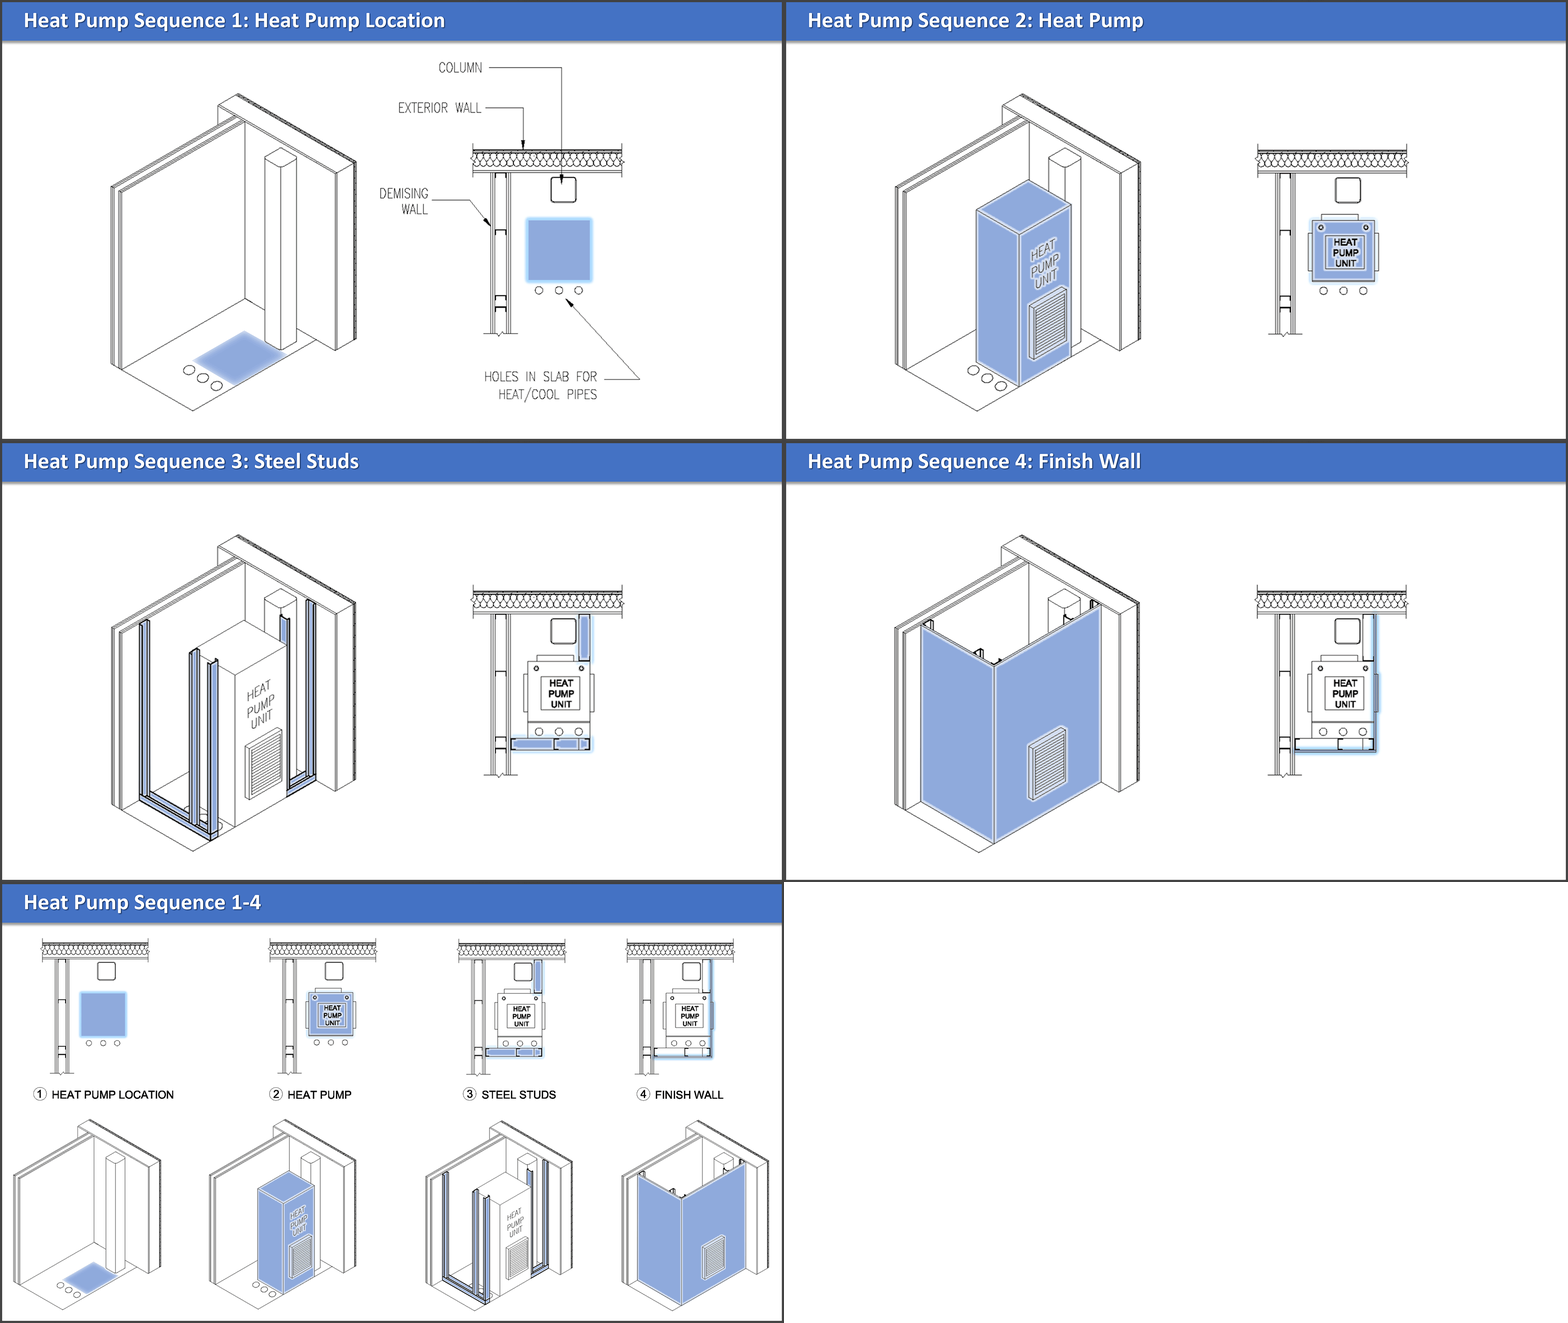
An effective way to isolate and view individual building components is to title, label, and take apart sections of a structure. Doing this makes it easy to show detail, highlight and label each distinct section, walk the viewer through the construction steps, and make comparisons. An effective way to do this is to show the features of a structure that have been taken apart (called an "exploded view"), highlight and zoom-in to address particular features, and then put it all back together again into its full structure.


Expert Tip:
The static cross section printed on an oversized board is an important tool. Place it on an easel for
your audience to stare at as long as possible. It's sure to stick in the minds of your judge and jury.


How can I compare as-designed and as-built?
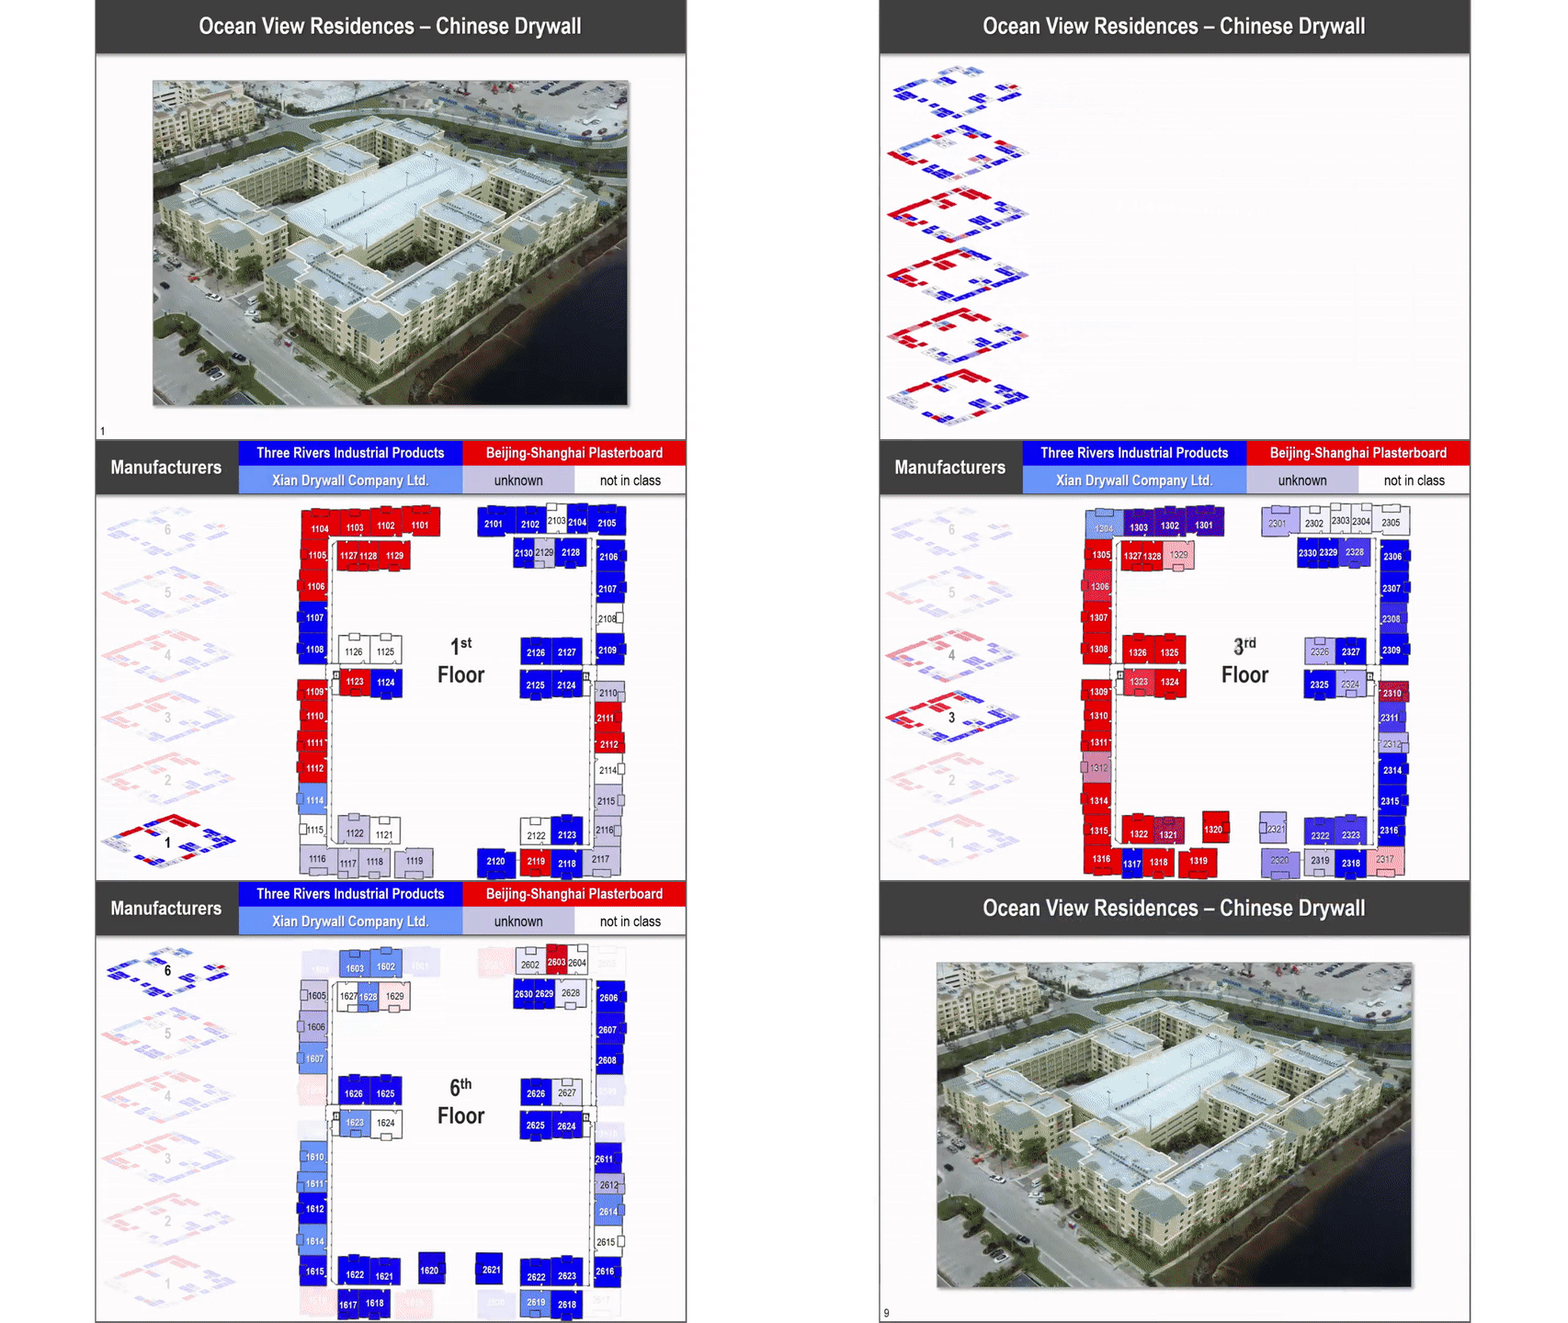
Compare as-designed to as-built to clearly depict how a structure was not built according to its structural plans and – as a result – one or more components failed, or sustained damage over time (e.g. stress on a feature of the structure, moisture encroachment causing mold, etc.). Utilize titling and labeling of parts to show detail, or highlight and label distinct sections—in separate steps—to show comparison. Show side-by-side or sequential views of as-designed versus as-built features of a structure.


Examples:



How can I show construction projects financials and sequencing?
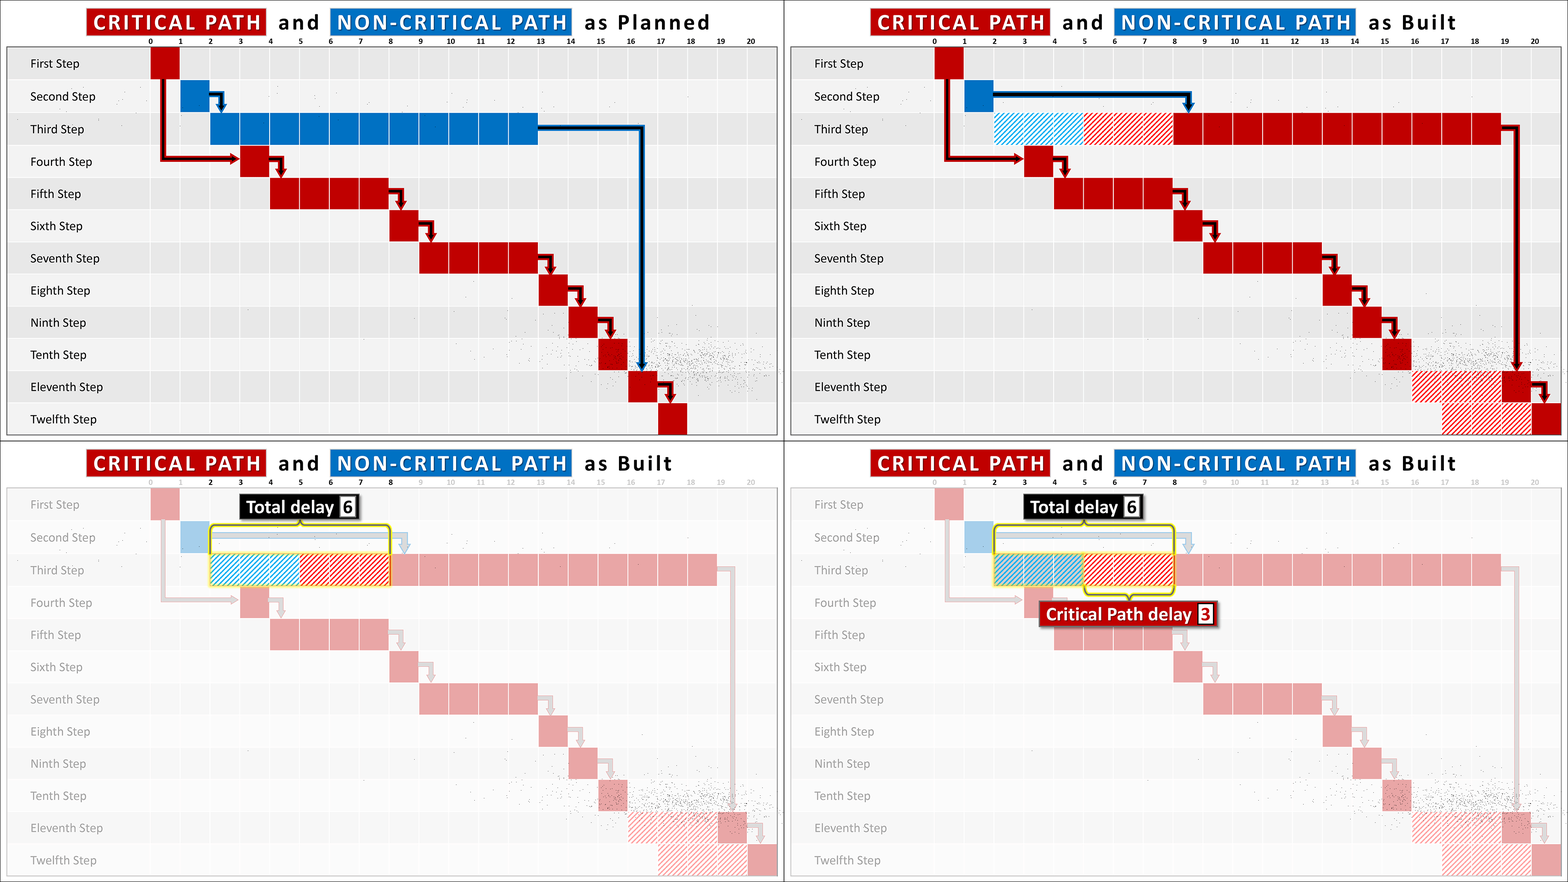
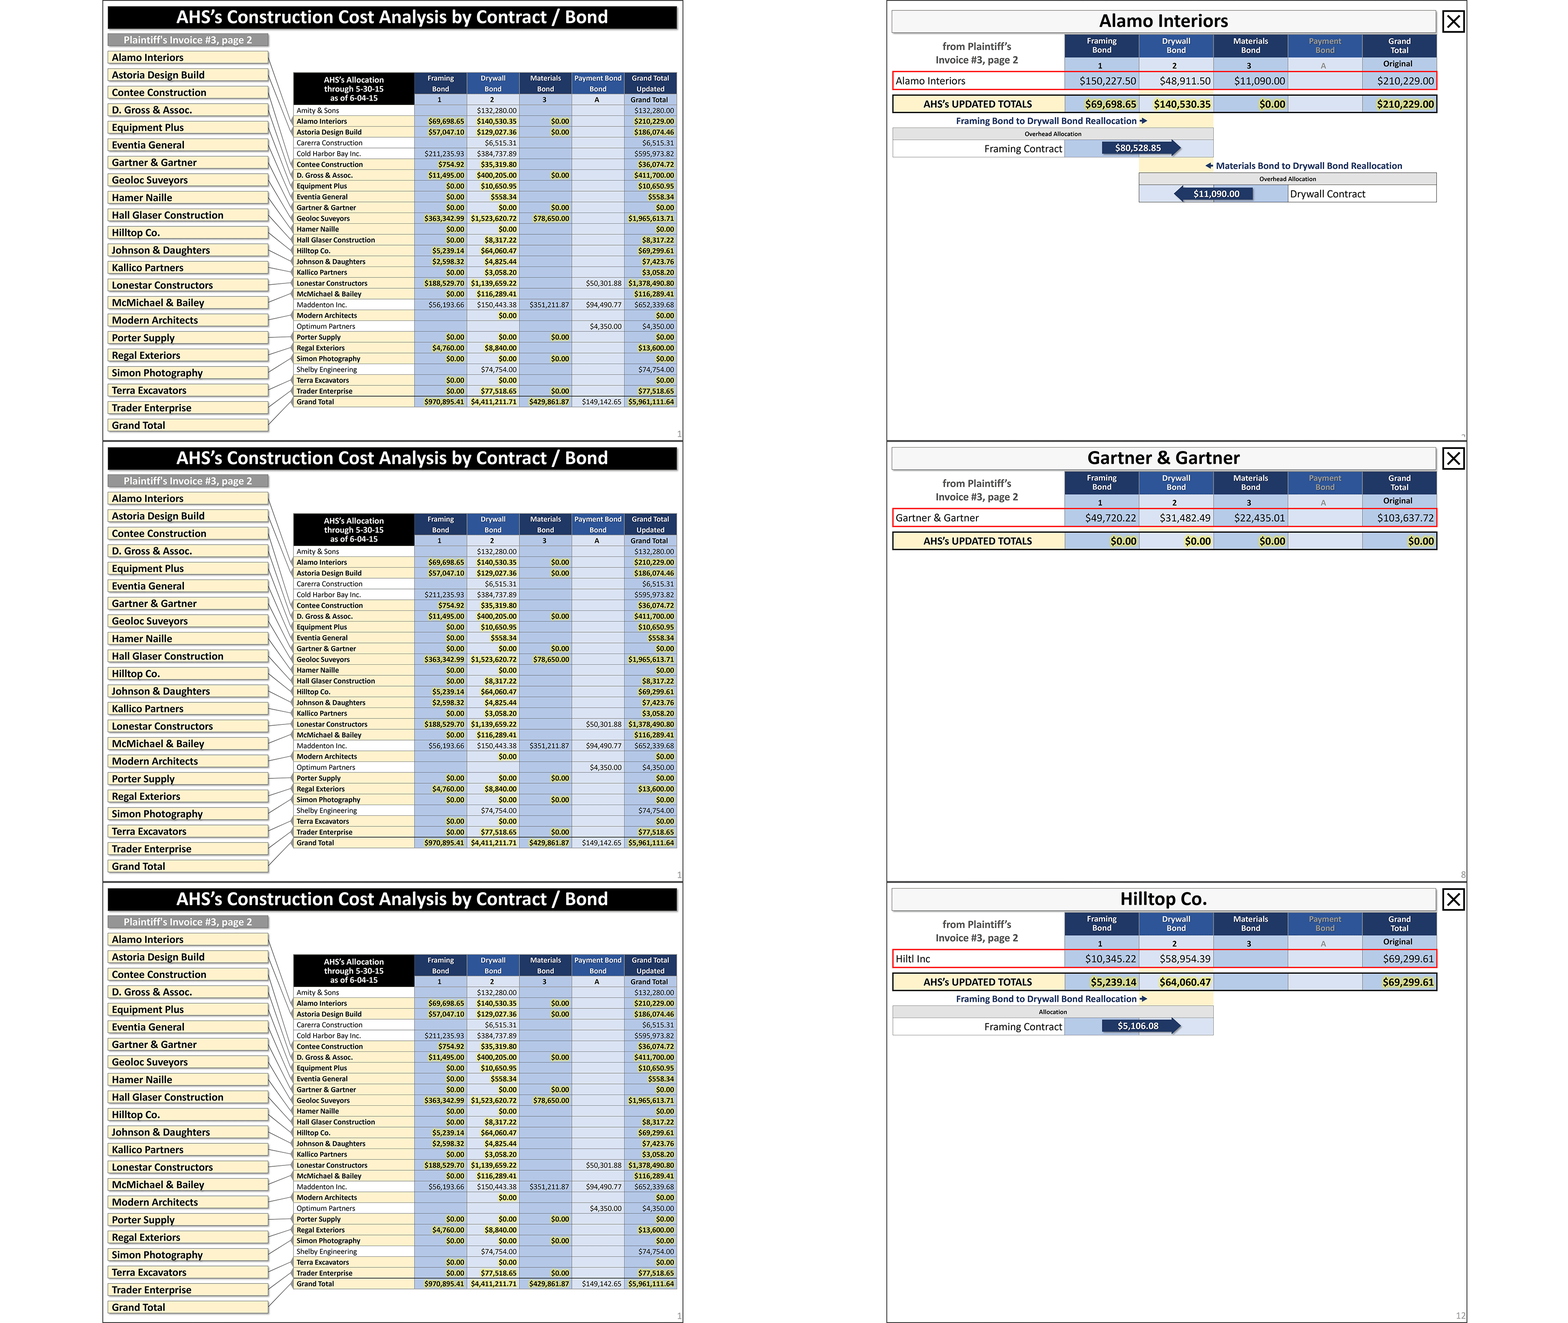
Take advantage of graphics to show project financials, critical path, and non-critical path clearly. Be sure to allow for both linear and non-linear presentation of the data with hyperlinking – which is especially helpful when the document is being used with multiple witnesses and when the judge, arbitrator, or mediator have questions about particular pieces of data. Digitally “build” the structure or components in the correct sequence.
Examples:



"DEG is my go-to graphics and animation company.
Professional, budget conscious, and great to work with.
They know how to get things done." - Sterne Kessler
To learn more about construction animation or other
types of complex demonstratives, click below to
meet with an expert graphics team member.
CLICK HERE TO
REQUEST A CONSULTATION


